Simple application Angular 6 and NodeJS with Ubuntu 16.04 and Visual Studio Code
I was working in a new angular application, and I decided to explain the steps that I used for that.
The first point is that I was using Ubuntu 64 bits, then i will just explain the steps that I used for that scenario.
For start with I choose Visual Studio Code as IDE.
To install the program on Ubuntu and still be able to automatically receive future updates from it, you must do the following:
Step 1 - Open a terminal (CTRL + ALT + T).
Step 2 - Use a command to upgrade as root:
sudo su -
Step 3 - Put your password
Step 4 - Check if your system is 64-bit, for this, use the following command in the terminal:
uname -m
Step 5 - If your system is 64-bit, add the program repository with this command or use this tutorial:
sudo sh -c 'echo' deb [arch = amd64] https://packages.microsoft.com/repos/vscode stable main "> /etc/apt/sources.list.d/vscode.list '
Step 6 - Download and install the program repository key, using the commands below:
curl https://packages.microsoft.com/keys/microsoft.asc | gpg --dearmor> microsoft.gpg
sudo mv microsoft.gpg /etc/apt/trusted.gpg.d/microsoft.gpg
Step 7 - Update the package manager with the command:
sudo apt-get update
Step 8 - Now use the command below to install the program;
sudo apt-get install code
Step 9 - When necessary, uninstall the program, using the command below;
sudo apt-get remove code
Step 10 - To start a program use a command:
vscode --user-data-dir
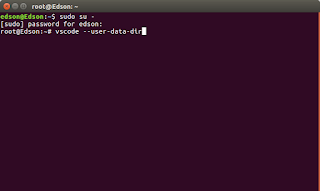
Then the program will start:


Lets see if our work is running, let's run the application and see if everything is ok, inside the created folder, using a command on the terminal in Visual Studio Code (make sure that you are in the correct folder):
ng serve
If all is ok you can open this page http://localhost:4200 indicating that it is working perfectly:

My complete project is here for example:
https://github.com/edsoncezar/vendasapp
The first point is that I was using Ubuntu 64 bits, then i will just explain the steps that I used for that scenario.
For start with I choose Visual Studio Code as IDE.
To install the program on Ubuntu and still be able to automatically receive future updates from it, you must do the following:
Step 1 - Open a terminal (CTRL + ALT + T).
Step 2 - Use a command to upgrade as root:
sudo su -
Step 3 - Put your password
Step 4 - Check if your system is 64-bit, for this, use the following command in the terminal:
uname -m
Step 5 - If your system is 64-bit, add the program repository with this command or use this tutorial:
sudo sh -c 'echo' deb [arch = amd64] https://packages.microsoft.com/repos/vscode stable main "> /etc/apt/sources.list.d/vscode.list '
Step 6 - Download and install the program repository key, using the commands below:
curl https://packages.microsoft.com/keys/microsoft.asc | gpg --dearmor> microsoft.gpg
sudo mv microsoft.gpg /etc/apt/trusted.gpg.d/microsoft.gpg
Step 7 - Update the package manager with the command:
sudo apt-get update
Step 8 - Now use the command below to install the program;
sudo apt-get install code
Step 9 - When necessary, uninstall the program, using the command below;
sudo apt-get remove code
Step 10 - To start a program use a command:
vscode --user-data-dir

Then the program will start:

The second point was to install NodeJS:
Ubuntu 16.04 contains a version of Node.js in its default repositories that can be used to easily provide a consistent experience across multiple servers.
To get this version, we only have to use the apt package manager. We should update our package index first and then install through the repositories, of course after to upgrade as root :
sudo apt-get update
sudo apt-get install nodejs
If the package in the repository meets your needs, this is all you need to do to have Node.js set up. In many cases, you'll also want to install npm, which is the Node.js. You can do this by typing:
sudo apt-get install npm
This will allow you to easily install modules and packages for use with Node.js.
Due to a conflict with another package, the Ubuntu repositories executable is called nodejs instead of node. Keep this in mind when running software.
The following will discuss some more flexible and robust installation methods.
An alternative that can bring you the latest version of Node.js is to add a PPA (Personal Packet File) maintained by NodeSource.
First, you need to install PPA in order to gain access to your content. Make sure you are in your home directory, and use curl to fetch the script for your preferred version, making sure to replace 6.x with the correct version string:
cd ~
curl -sL https://deb.nodesource.com/setup_6.x -o nodesource_setup.sh
You can inspect the contents of this script with nano (our preferred text editor):
nano nodesource_setup.sh
And run the script:
sudo bash nodesource_setup.sh
The PPA will be added to your configuration and your local package cache will be updated automatically. After running the nodesource configuration script, you can install the Node.js package in the same way you did above:
sudo apt-get install nodejs
The nodejs package contains the binary nodejs as well as the npm, so you do not need to install the npm separately. However, for some npm packages to work (such as those that require source compilation), you will need to install the build-essential package:
sudo apt-get install build-essential
Installing Using NVM
An alternative to installing Node.js through apt is to use a specially designed tool, called nvm, which means "Node.js version manager" or "Node.js Version Manager".
To begin with, we'll need to get the software packages from our Ubuntu repository, which will allow us to compile source packages. The nvm script will take advantage of these tools to build the required components:
sudo apt-get update
sudo apt-get install build-essential libssl-dev
Once the required packages are installed, you can download the nvm installation script from the GitHub project page. The version number may be different, but in general, you can download it with the curl:
curl -sL https://raw.githubusercontent.com/creationix/nvm/v0.31.0/install.sh -o install_nvm.sh
And inspect the installation script with nano:
nano install_nvm.sh
Run the script with bash:
bash install_nvm.sh
It will install the software into a subdirectory of your home directory in ~ / .nvm. It will also add the necessary lines to your ~ / .profile file to use the file.
To gain access to the nvm functionality, you need to sign out and log in again, or you can scan the ~ / .profile file so that your current session knows about the changes:
source ~ / .profile
Now that you have nvm installed, you can install isolated versions of Node.js.
To find the versions of Node.js that are available for installation, you can type:
nvm ls-remote
Output
...
v0.1.14
v0.1.15
v0.1.16
v0.1.17
v0.1.18
v0.1.19
v0.1.20
v0.1.21
v0.1.22
v0.1.23
v0.1.24
v0.1.25
v0.1.26
v0.1.27
v0.1.28
v0.1.29
v0.1.30
v0.1.31
v0.1.32
v0.1.33
v0.1.90
v0.1.91
v0.1.92
v0.1.93
v0.1.94
v0.1.95
v0.1.96
v0.1.97
v0.1.98
v0.1.99
v0.1.100
v0.1.101
v0.1.102
v0.1.103
v0.1.104
v0.2.0
v0.2.1
v0.2.2
v0.2.3
v0.2.4
v0.2.5
v0.2.6
v0.3.0
v0.3.1
v0.3.2
v0.3.3
v0.3.4
v0.3.5
v0.3.6
v0.3.7
v0.3.8
v0.4.0
v0.4.1
v0.4.2
v0.4.3
v0.4.4
v0.4.5
v0.4.6
v0.4.7
v0.4.8
v0.4.9
v0.4.10
v0.4.11
v0.4.12
v0.5.0
v0.5.1
v0.5.2
v0.5.3
v0.5.4
v0.5.5
v0.5.6
v0.5.7
v0.5.8
v0.5.9
v0.5.10
v0.6.0
v0.6.1
v0.6.2
v0.6.3
v0.6.4
v0.6.5
v0.6.6
v0.6.7
v0.6.8
v0.6.9
v0.6.10
v0.6.11
v0.6.12
v0.6.13
v0.6.14
v0.6.15
v0.6.16
v0.6.17
v0.6.18
v0.6.19
v0.6.20
v0.6.21
v0.7.0
v0.7.1
v0.7.2
v0.7.3
v0.7.4
v0.7.5
v0.7.6
v0.7.7
v0.7.8
v0.7.9
v0.7.10
v0.7.11
v0.7.12
v0.8.0
v0.8.1
v0.8.2
v0.8.3
v0.8.4
v0.8.5
v0.8.6
v0.8.7
v0.8.8
v0.8.9
v0.8.10
v0.8.11
v0.8.12
v0.8.13
v0.8.14
v0.8.15
v0.8.16
v0.8.17
v0.8.18
v0.8.19
v0.8.20
v0.8.21
v0.8.22
v0.8.23
v0.8.24
v0.8.25
v0.8.26
v0.8.27
v0.8.28
v0.9.0
v0.9.1
v0.9.2
v0.9.3
v0.9.4
v0.9.5
v0.9.6
v0.9.7
v0.9.8
v0.9.9
v0.9.10
v0.9.11
v0.9.12
v0.10.0
v0.10.1
v0.10.2
v0.10.3
v0.10.4
v0.10.5
v0.10.6
v0.10.7
v0.10.8
v0.10.9
v0.10.10
v0.10.11
v0.10.12
v0.10.13
v0.10.14
v0.10.15
v0.10.16
v0.10.17
v0.10.18
v0.10.19
v0.10.20
v0.10.21
v0.10.22
v0.10.23
v0.10.24
v0.10.25
v0.10.26
v0.10.27
v0.10.28
v0.10.29
v0.10.30
v0.10.31
v0.10.32
v0.10.33
v0.10.34
v0.10.35
v0.10.36
v0.10.37
v0.10.38
v0.10.39
v0.10.40
v0.10.41
v0.10.42
v0.10.43
v0.10.44
v0.10.45
v0.10.46
v0.10.47
v0.10.48
v0.11.0
v0.11.1
v0.11.2
v0.11.3
v0.11.4
v0.11.5
v0.11.6
v0.11.7
v0.11.8
v0.11.9
v0.11.10
v0.11.11
v0.11.12
v0.11.13
v0.11.14
v0.11.15
v0.11.16
v0.12.0
v0.12.1
v0.12.2
v0.12.3
v0.12.4
v0.12.5
v0.12.6
v0.12.7
v0.12.8
v0.12.9
v0.12.10
v0.12.11
v0.12.12
v0.12.13
v0.12.14
v0.12.15
v0.12.16
v0.12.17
v0.12.18
iojs-v1.0.0
iojs-v1.0.1
iojs-v1.0.2
iojs-v1.0.3
iojs-v1.0.4
iojs-v1.1.0
iojs-v1.2.0
iojs-v1.3.0
iojs-v1.4.1
iojs-v1.4.2
iojs-v1.4.3
iojs-v1.5.0
iojs-v1.5.1
iojs-v1.6.0
iojs-v1.6.1
iojs-v1.6.2
iojs-v1.6.3
iojs-v1.6.4
iojs-v1.7.1
iojs-v1.8.1
iojs-v1.8.2
iojs-v1.8.3
iojs-v1.8.4
iojs-v2.0.0
iojs-v2.0.1
iojs-v2.0.2
iojs-v2.1.0
iojs-v2.2.0
iojs-v2.2.1
iojs-v2.3.0
iojs-v2.3.1
iojs-v2.3.2
iojs-v2.3.3
iojs-v2.3.4
iojs-v2.4.0
iojs-v2.5.0
iojs-v3.0.0
iojs-v3.1.0
iojs-v3.2.0
iojs-v3.3.0
iojs-v3.3.1
v4.0.0
v4.1.0
v4.1.1
v4.1.2
v4.2.0
v4.2.1
v4.2.2
v4.2.3
v4.2.4
v4.2.5
v4.2.6
v4.3.0
v4.3.1
v4.3.2
v4.4.0
v4.4.1
v4.4.2
v4.4.3
v4.4.4
v4.4.5
v4.4.6
v4.4.7
v4.5.0
v4.6.0
v4.6.1
v4.6.2
v4.7.0
v4.7.1
v4.7.2
v4.7.3
v4.8.0
v4.8.1
v4.8.2
v4.8.3
v4.8.4
v4.8.5
v4.8.6
v4.8.7
v4.9.0
v4.9.1
v5.0.0
v5.1.0
v5.1.1
v5.2.0
v5.3.0
v5.4.0
v5.4.1
v5.5.0
v5.6.0
v5.7.0
v5.7.1
v5.8.0
v5.9.0
v5.9.1
v5.10.0
v5.10.1
v5.11.0
v5.11.1
v5.12.0
v6.0.0
v6.1.0
v6.2.0
v6.2.1
v6.2.2
v6.3.0
v6.3.1
v6.4.0
v6.5.0
v6.6.0
v6.7.0
v6.8.0
v6.8.1
v6.9.0
v6.9.1
v6.9.2
v6.9.3
v6.9.4
v6.9.5
v6.10.0
v6.10.1
v6.10.2
v6.10.3
v6.11.0
v6.11.1
v6.11.2
v6.11.3
v6.11.4
v6.11.5
v6.12.0
v6.12.1
v6.12.2
v6.12.3
v6.13.0
v6.13.1
v6.14.0
v6.14.1
v6.14.2
v7.0.0
v7.1.0
v7.2.0
v7.2.1
v7.3.0
v7.4.0
v7.5.0
v7.6.0
v7.7.0
v7.7.1
v7.7.2
v7.7.3
v7.7.4
v7.8.0
v7.9.0
v7.10.0
v7.10.1
v8.0.0
v8.1.0
v8.1.1
v8.1.2
v8.1.3
v8.1.4
v8.2.0
v8.2.1
v8.3.0
v8.4.0
v8.5.0
v8.6.0
v8.7.0
v8.8.0
v8.8.1
v8.9.0
v8.9.1
v8.9.2
v8.9.3
v8.9.4
v8.10.0
v8.11.0
v8.11.1
v8.11.2
v9.0.0
v9.1.0
v9.2.0
v9.2.1
v9.3.0
v9.4.0
v9.5.0
v9.6.0
v9.6.1
v9.7.0
v9.7.1
v9.8.0
v9.9.0
v9.10.0
v9.10.1
v9.11.0
v9.11.1
v10.0.0
-> v10.1.0
v10.2.0
v10.2.1
v10.3.0
As you can see, the latest version at the time of this writing is v10.3.0. You can install it by typing:
nvm install 10.3.0
Generally, nvm will switch to use the latest version installed. You can explicitly tell nvm to use the version we just downloaded by typing:
nvm use 10.3.0
When you install Node.js using nvm, the executable is called node. You can see the version currently being used by the shell by typing:
node -v
Output
v10.3.0
If you have multiple versions of Node.js, you can see what is installed by typing:
nvm ls
If you want to make one of the versions standard, you can type:
nvm alias default 10.3.0
This version will automatically be selected when a new session is started. You can also reference it by its nickname like this:
nvm use default
Each version of Node.js will keep track of its own packages and have npm available to manage them.
You can have npm installation packages for the ./node_modules directory of the Node.js project using the normal format. For example, for the express module:
npm install express
If you want to install it globally (making it available for other projects that use the same version of Node.js), you can add the -g flag:
npm install -g express
This will install the package in:
~ / .nvm / node_version / lib / node_modules / package_name
Installing globally will allow you to execute commands through the command line, but you will have to bind the package in your local sphere to require it from within a program:
npm link express
You can learn more about the options available with nvm by typing:
nvm help
The third point, now that we have everything installed we will start the Angular project, using the Angular CLI. Enter the command:
ng new theNameYouWantForYourApp
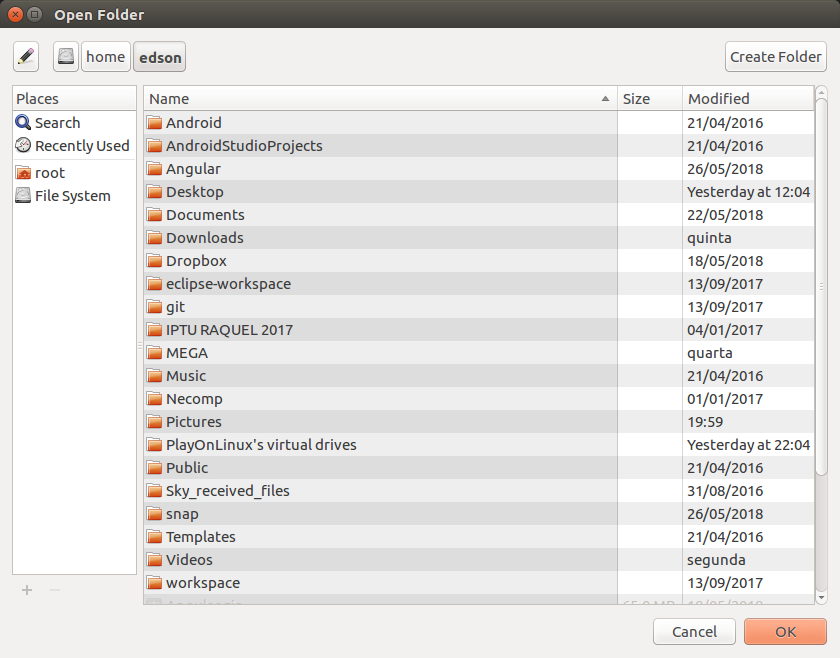
Well, after everything downloaded and installed, let's see how it got. Open the project folder, again open your Visual Studio Code:
vscode --user-data-dir

And choose your project folder:
ng serve
If all is ok you can open this page http://localhost:4200 indicating that it is working perfectly:

My complete project is here for example:
https://github.com/edsoncezar/vendasapp


Comentários
Postar um comentário